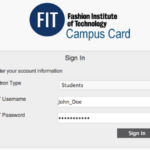
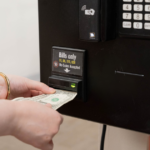
Where are Campus Pay Kiosk located?
- Outside Student Dining Hall – Dubinsky Center
- Computer Commons CC15 – Feldman Center Basement
- Outside PrintFX – Pomerantz Center D529A
- FIT Library 5th Floor – Goodman Center
How much are Pay-for-Print services?
Printouts Cost:
10 cents for black and white
90 cents for color
Tech Tip:
Letter 8.5 x 11 cost is the same as tabloid 11 x 17

Pay-for-Print Limitations
- There is no printing from personal devices (laptops, phones, etc.)
- No duplex (double-sided) printing
- No custom paper stock (must use paper supplied in printers)
- Only paper size selections acceptable are: US Letter 8.5. x 11 (Portrait or Landscape), Tabloid 11 x 17 (Portrait) and Ledger 17 x 11 (Landscape)
- No B&W printing from Mac computers in the Library (use Windows) or convert the files to grayscale
- Printers in classrooms and labs are set to “Draft” or “Eco-mode” for faster printing and to use minimal ink. For photo or presentation-grade prints, please visit PrintFX and FabLab for professional printing services
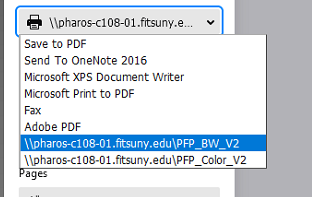
Pay-for-Print Printer Selection on a Windows Computer
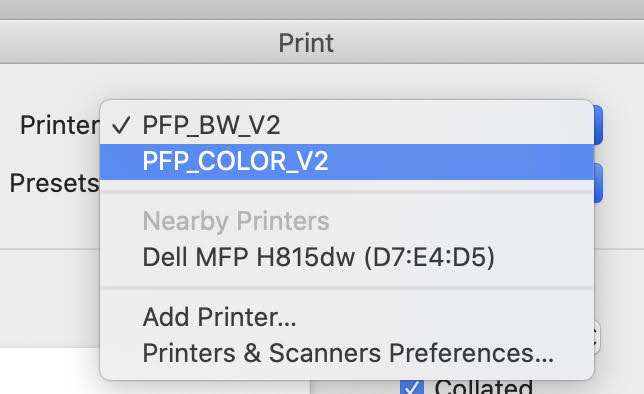
Pay-for-Print Printer Selection on a Mac Computer
Deletion and Canceling of Print Jobs
Print jobs are not released until after you have entered your network password at the print release station and selected which jobs you wish to release. Jobs that have not been released within 10 hours will be deleted from the printer queue. If you wish, you may also select the job from the Print Release Station and select Delete.
In 2019 we rolled out a new IT ticketing system including an improved self-service portal. With the self-service portal, you are able to report issues, open requests, and check their status.
To use the self-service portal, go to TechHelp.fitnyc.edu and log in with your FIT username and password, no need to create a new login or password.
Cant’ login? Email [email protected].
We are very pleased to announce that as of September 14, 2016; you will be able to use your FIT password to access your Microsoft Office 365 account, no need to manage a separate password for this service.
If you are unable to sign into your Microsoft Office 365 account, please verify that you can sign into MyFIT. If you are able to sign into MyFIT, please contact TechHelp so we may assist you with your password.
What is spam?
Spam is electronic junk mail. Unwanted messages sent to a large number of recipients.
Why are emails marked as spam?
- You previously marked these messages as spam by clicking the “Report spam” or “Report phishing” button. Both actions will send the message to your Spam folder and remove it from your Inbox.
- Gmail automated detections system identified the message as suspicious and marked it as spam
How do I keep a message from going to spam?
It is important to check your spam periodically because all messages that have been in spam for more than 30 days will automatically be deleted.
How to delete spam
- Go to spam
- Select the messages you wish to delete the click “Delete forever” or click “Delete all spam messages now”
- Messages deleted from spam cannot be restored
- All messages that have been in spam for more than 30 days will automatically be deleted
- You will see the message “Hooray, no spam here!” when your spam is empty
When you click on an email link on a web page or email message, your computer will open a new compose window with the email address populated in the To: line. The program used to compose the message is determined by the default mail client for your computer. To make Gmail your default mail client, please follow these instructions.
If you use more than one browser you will want to follow the instructions for each browser.
Follow the latest instructions from Google at https://support.google.com/a/users/answer/9308783?hl=en
Sign in to MyFIT
Go to http://myfit.fitnyc.edu
Enter your FIT username and password, then click the “Sign in” button
Click on FIT Book It under Web Resources
Select the space to book
Select the space you want to make a booking for; you may also review options for all spaces by building by selecting “All Categories” under the building name.

You may amend your search by returning to https://fitnyc-it.libcal.com/ or using the drop-down menus near the top of the page.

Select booking date
Select the date you’d like to find a booking using the “Go To Date” button, or you can click on the “Next Available” button, and it will automatically jump to the next available time/date. Please note bookings may not be available when the college is closed or for planned maintenance, for details about IT planned maintenance, please visit our System Status page.
If you want to change a selection, you can click on “You can go back and change the filters.”

By default, the seat/space options will view by day. You may click the “Week View” option for a weekly view. Click the “Day View” option to return to a daily view.

Select booking time
Seat/Spaces will display with a schedule based on your filtering criteria set on the previous screens. Available times will display in green, your booking (once selected) will appear in yellow, and unavailable times will display in red.

To select a booking time, click on the time block you would like to start your booking and it will autofill the booking for the default minimum timeframe.


Below the Seat/Spaces schedule, your booking(s) will display from the start time you selected.

Submit or modify booking
Review your bookings and click the “Submit Times” button, or you may modify your booking.
To modify your booking:
- You can cancel a selection by clicking on the trash bin icon to delete
- You can reduce or increase the length of time of your booking by clicking on the drop-down arrow and selecting an earlier time.

If you accessed FIT Book It using a direct link and not through MyFIT, you will be asked to authenticate.
Enter your FIT username and password and click the “Sign in” button.

Review Terms & Conditions
Review your booking, Terms & Conditions. By clicking the “Continue” button you are agreeing to the Terms & Conditions.
Review and Submit Booking
You will be returned to the Booking Details page. You will be able to review your booking(s).
- If your booking is correct, you may click the “Submit my Booking” button.
- If you made a mistake in your booking, you may click the “Remove” button.

Make another booking or logout
You will be directed to the Booking Details page to review the booking(s). If you are finished making bookings, click the “Logout” button. You may also make another booking by clicking on the “Make Another Booking” button.

Email confirmation
After you complete a booking, you will be sent a confirmation email to your FIT email that will include an option to add the booking to your calendar as well as the details you will need to complete the check-in process upon arriving at FIT. Do not delete your confirmation email as it contains important check-in information. Please arrive 15-minutes (but no earlier) before your booking time to allow the necessary time for check-in procedures.
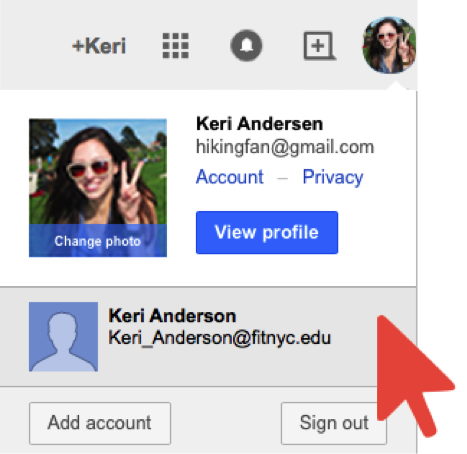
If you have more than one Google Account, you can sign in to multiple accounts at once. That way, you can switch between accounts without signing out and back in again. Please note, that the Gmail icon in MyFIT is linked to https://mail.google.com/ therefore opens to your default account or the account you are currently signed in to – this may or may not be your FIT Gmail account. Your accounts have separate settings, but in some cases, settings from your default account might apply.
Additionally, you may encounter access denied or request access to G Suite applications such as Docs, Forms, and Sheets. If you attempt to access these resources with your Non-FIT account. Make sure you are signed in to your FIT account when accessing these documents. Before you request access, make sure you are not signed in to your personal or Non-FIT account.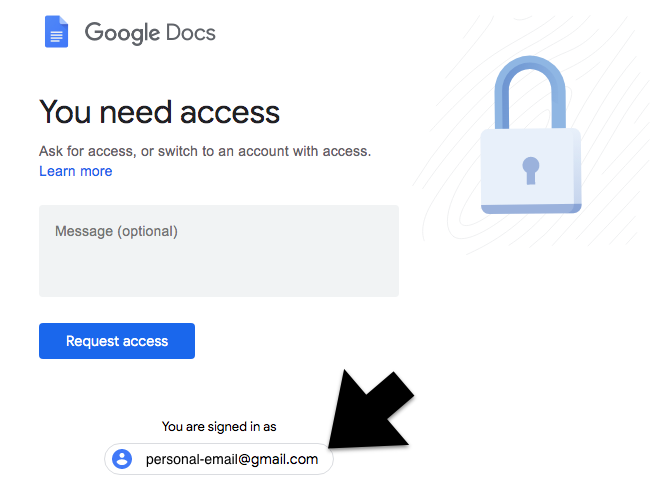
Add accounts
- On your computer, sign in to Google.
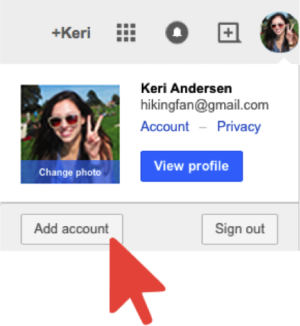
- On the top right, select your profile image or initial.
- On the menu, choose Add account.
- Follow the instructions to sign in to the account you want to use.
- Go to www.office.com
Enter your FIT email address
Click the “Next” button
Note: Offer and access is not available to Pre-College, Continuing Education, and Seminar Students.
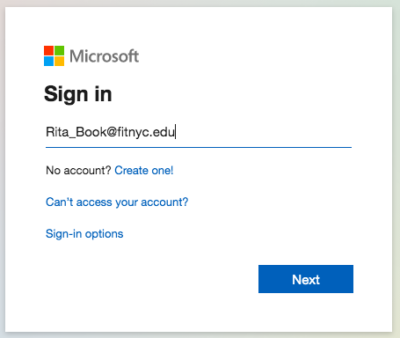
2. Enter your FIT Password and click “Sign in” button
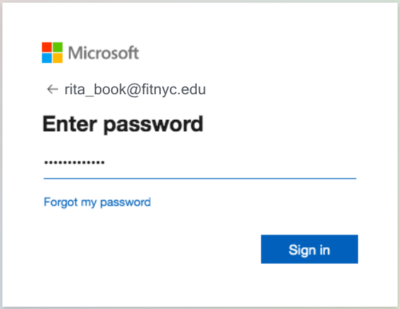
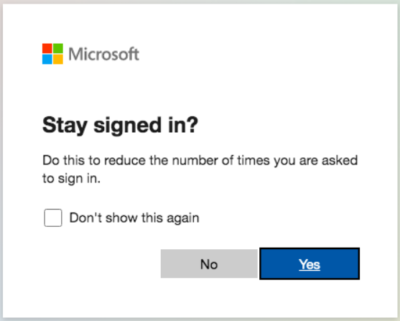
3. Recommended: select “No”, if you are accessing your Microsoft Office 365 account on a shared computer.
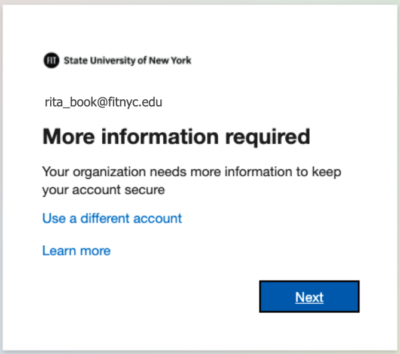
4. Beginning on June 9, 2021 FIT began using Self-Service Password Reset (SSPR) from Microsoft to allow the FIT community to manage their password without needing to contact TechHelp.
As part of this new tool, access to Office 365 requires individuals to register to use SSPR. If you receive this message click the “Next” button and complete the registration process.
5. You may now use Office 365 apps online or install on your computer

Direct Access
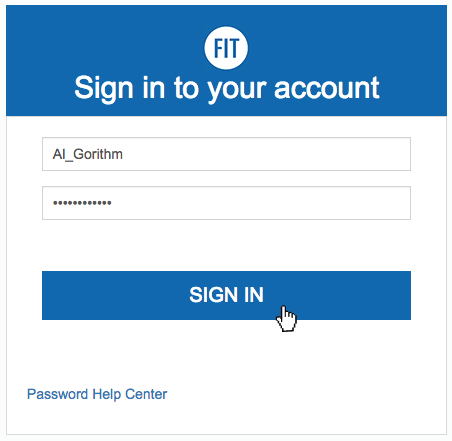
To log in to Brightspace, go to https://brightspace.fitnyc.edu/ in your web browser. (DO NOT add “www” to the address.)
Enter your FIT Username and Password (same credentials as you use for MyFIT).
Once you have entered your credentials, click Sign In
If your username and password are accepted you will be redirected to your Brightspace
Through MyFIT
When MyFIT is unavailable for scheduled maintenance, use the Direct Access option for Brightspace.
Click on the Brightspace logo in the top menu
You will be redirected to your Brightspace
Need More Help?
Unable to log in; problem with your username and/or password, contact TechHelp.
If you need help using Brightspace that is unrelated to your username and password, please contact the SUNY Online Support Services Help Desk by calling 1-844-673-6786, emailing [email protected], or submitting a Ticket with SUNY Online.
For more information about Brightspace, visit our Brightspace page for resources.
A valid FIT Username and FIT Password is required to use FIT Computers. Access to FIT Computers is only available to current FIT Students, Staff, and Faculty. Need help with a password? Visit the Password Help Center.
Windows Computer
Hit Ctrl + Alt + Del as instructed if the login window is not displayed.
Enter your FIT Username and FIT Password in the corresponding fields. On shared office machines, you may have to select “Other user” before you can enter your FIT Username and FIT Password.
Hit Enter or Click Login.
Mac Computer
Enter your FIT Username and FIT Password in the corresponding fields.
Hit Enter.
Tech Tips
Work saved on the desktop or local drive in the computer labs will be cleared when the computer is rebooted or you log off, this data cannot be restored.
Always log off the computer when you are finished working.
