2-Factor Authentication (2FA) is also referred to as 2-Step Verification.
- Sign in to your FIT Gmail Account
- Go to “Manage your Google Account” by clicking your profile icon on the upper right-hand side of the screen or by going directly to https://myaccount.google.com/.
- Using the left-hand menu, select “Security.”

- Scroll down to the “Signing in to Google” section and locate “2-Step Verification.” Then click the arrow on the 2-Step Verification row.

- Verify your account by re-entering your password. Reminder: Google will ask you to reenter your password whenever you make changes to your account’s security.

- Enter your phone number and select one of the radial buttons under “How do you want to get codes” or click show more options. Once you select your option, Click Next.
Note you may repeat the enrollment process to select additional verification methods.

Options Explained
- Confirm that it works by entering the code that was sent to the phone number you entered.

If you select “text message,” enter the 6-digit number received via text message.

If you selected “voice call,” enter the 6-digit code provided by the automated voice. Note: The phone call might come in as “potential spam.”

If you select “Google Prompt.” Remember, to use this option you need to have a phone number registered with Google if you do not first select Text message or Phone Call then repeat the enrollment process and select Google Prompt.
iPhone
If you have an iPhone open the Gmail app on your phone, and the prompt notification will appear (this takes a few seconds, it does not appear as an email; it is a pop-up message).
Andriod
If you have an Andriod, the prompt should appear in the form of a push notification. Push notifications turned off? Open the Gmail app on your phone, and the prompt notification will appear (this takes a few seconds, it does not appear as an email; it is a pop-up message).
If you requested the sign-in, tap “Yes” to allow it. If you didn’t request the sign-in, tap “No” to block it.

- Click “turn on” to fully enroll in 2-step verification for the FIT Google account.

Additional Details
You will also receive an email to your FIT Google account from “[email protected]” notifying you that 2-step verification has been turned on for your FIT account. You will receive additional email alerts when/if you turn on additional verification methods described below.

Use other verification methods
Once you are enrolled in 2-step verification, Google allows you to set up additional backup steps so you can sign in even if your other options aren’t available. You can set up other verification methods in case you:
- Want increased protection against phishing
- Can’t get Google prompts
- Lose your phone
Learn about alternate methods:
Backup codes
Google prompts
Authenticator App
Backup Phone
Security key
About devices you trust
If you don’t want to enter a 2-Step Verification code every time you sign in to your Google Account, you can mark your computer or mobile device as trusted. By default – the device you set up for 2-step verification will automatically be added to the “trusted list.”
When you sign-in on a new device, whether it be your phone, iPad, or just a different computer, you will need to verify your account using the 2-step verification method that you chose. When logging in, you can choose not to use 2-Step Verification again on that particular device or computer. Check the box “Don’t ask for codes again on this computer.”
From then on, that computer will only ask for your password when you sign in.

If anyone else tries to sign in to your account from another computer or location, 2-Step Verification will be required, and your account will be protected.
Learn more about how to add trusted devices to your account.
If you wish to disconnect your profile due to privacy concerns, please note that even when the profile is connected to your LinkedIn Learning account, FIT can only see your LinkedIn profile picture and the information you’ve set to public.
If you still wish to disconnect your Learning license from your LinkedIn profile, please:
- Log in to LinkedIn Learning.
- Click your photo in the top right corner and select Settings from the dropdown that appears.
- Below Disconnect your LinkedIn account from your LinkedIn Learning account provided by your organization, click Disconnect my account.
- Click Disconnect.
Deactivate an ID Card
If you believe your FIT is lost or stolen, the first thing you need to do is deactivate the card. Everyone has the ability to deactivate their card blocking access to meal plan funds and Fashion Express funds. Follow our instructions on how to deactivate your FIT ID card.
1. Go to https://fit-sp.blackboard.com/eaccounts
Alternatively, you may log in to MyFIT with your Username and Password then select “FIT Campus Card” under FIT Web Resources.
2. Log in to your eAccount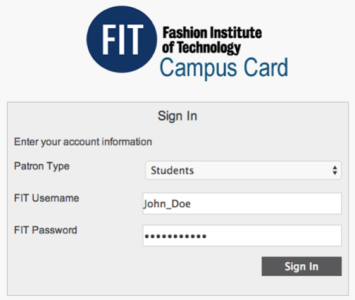
Select Patron Time; this is your primary role at FIT
Enter your FIT Username and your FIT Password
(the same login information you use for MyFIT)
Click the “Sign In” button
3. Select “Card Services”![]()
4. Click the Deactivate Card button
5. You will get the message “The selected card number has been deactivated.”
If you find your deactivated card prior to getting a replacement ID, you can reactivate the FIT ID Card. However, if you have replaced the ID Card it cannot be reactivated return the found ID Card to Public Safety. To activate a deactivated card that has not been replaced follow the above steps 1-3.
Select “Activate Card” found under the main menu bar then click the Activate Card button.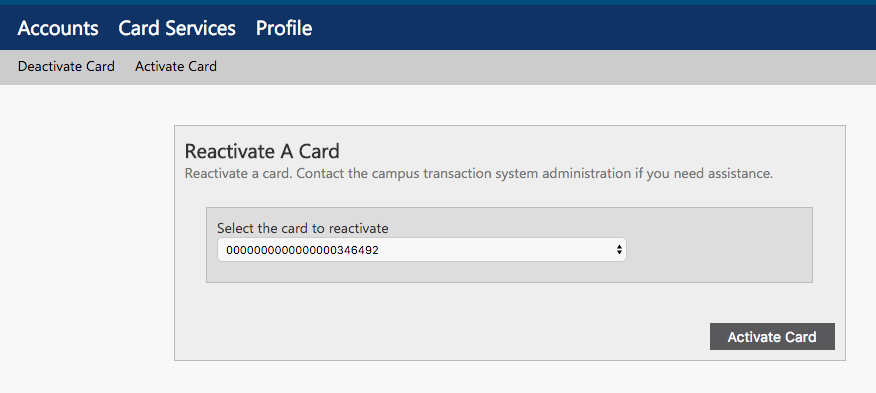
You will get the message “The selected card number has been activated.”
Replacing an ID Card
If you do not find your ID card or believe it was stolen, you will need to pay for a replacement.
1. Go to the Bursar in the Business and Liberal Arts Center B127 during Office Hours.
2. Let the cashier know you have lost your ID card and pay the fee (visit http://www.fitnyc.edu/bursar/fees.php to see latest fee amounts).
3. The Bursar cashier will provide you with a slip to present to Public Safety.
4. Go to Public Safety in the Pomerantz Art and Design Center D442. Public Safety will then call for a Public Safety Guard to meet you in the Public Safety Office – this office is closed when not in use.
5. Give the proof of Fee Payment for ID Replacement to the Public Safety Guard and they will print you a new ID. Note: You will not be required to sit for a new photo, your photo is already on file.
6. For your protection, once a card is replaced, it cannot be reactivated. If you find the original card and then lose the replacement, you cannot use it. You should bring in the original card to Public Safety and get another replacement.
Fees
Visit http://www.fitnyc.edu/bursar/fees.php to see latest fee amounts.
Please review the official FIT Campus Card and Campus Access policy.
When you connect your LinkedIn account, only your learning activity and profile information (name, title, profile photo) are shared with FIT LinkedIn Learning account administrators.
To begin, go to https://www.linkedin.com/learning and click the “Sign in” button in the top right hand corner of the page.

Enter your FIT email address and click the “Continue” button.

FIT requires you to authenticate with your FIT login credentials. Click the “Sign in with Single Sign-On”.

Enter your FIT username and password, then click “Sign In” button.

Next, you’ll be prompted to connect your personal LinkedIn account, or continue without connecting an account. Select “Continue without LinkedIn”

You will be directed to the welcome screen. Click the “Sounds Good” to continue. (Note: this screen may look different for you)

Select the skills that are of most interest to you. As you select skill categories, similar skills will populate that you may also be interested in. You will be able to click continue after you select at least three.

Set a weekly learning goal if you want reminders to continue learning each week, or skip the prompt – you can set a weekly goal later, if you wish.

You’re all set, click the “Start Learning” button and begin watching courses and start learning!

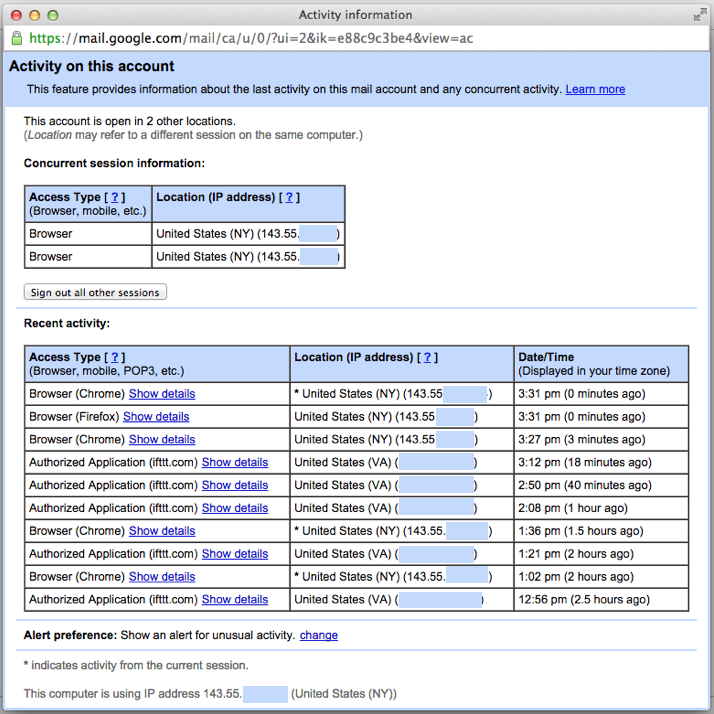
G Suite for Education offers a multitude of security features including allowing you to monitor how your account is being accessed through the Activity Information panel. This is one of the easiest ways for you to ensure that your account isn’t being accessed without your permission. “The Activity Information Panel” allows you to check what browser, device, and locations where your account has been signed into from.
How to Check your Activity Information
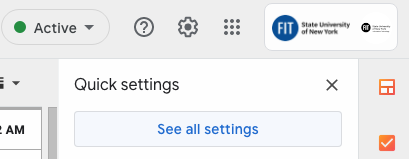
Go to Settings
- Click on Settings (Cog Icon)
- Select See all settings
Scroll to the Bottom and then Click on “Details”
![]()
What you can do from the Activity Information Panel?
– Check the IP address at the bottom of the window “This computer is using IP address” to know if the Recent activity was from your computer.
– If you have signed into another computer recently or you aren’t sure about another session. Click “Sign out all other sessions”
– Set your Alert preference, we recommend having it set to “Show an alert for unusual activity.”
– Revoke access for any Applications you previously authorized. Click on “Show details” then on “Manage Account Access” the Account Permissions page will open. Now you can select the application – then click “Revoke”.
Don’t forget to change your password if you see any activity that is not you.
You will not be able to use these instructions to manage your password if you have not registered to use Self-Service Password Reset (SSPR). Learn how to register.
FIT generic accounts cannot use SSPR (i.e., [email protected]); please contact TechHelp for assistance.
1. Click the “Change Password” button on this page or from the Password Help Center to be directed to the Self-Service Password Reset (SSPR). Note you will be redirected to a Microsoft page as our SSPR is a Microsoft product.
2. Enter your FIT Email Address and the characters in the picture or words in the audio, then click the “Next” button. Note: the page will load with a Microsoft logo, the FIT logo will appear after you enter a valid FIT email address.
You must enter an FIT email address, you will be presented with error text in red if you enter a username or invalid FIT email address.

3. Click on the radial button next to the method you wish to use for verification. Enter additional details and verification code to continue.

4. Enter your verification code.

5. Enter and confirm your new password, then click the “Next” to create your new password.
Once you create a password that meets the password requirements you will be redirected to your Office 365 account.
The password created using SSPR is your FIT password and grants you access to MyFIT, email, and more not just Office 365.

6. If you have connected a Mobile device to the FIT wireless network you need to “Forget the Network” and then reconnect with the new password. Failure to do this may cause your account to get locked out. Learn how Android Instructions or iOS Instructions.
7. If you have 2FA turned on for your FIT Google Workspace account you will be asked to sign in and authenticate again on all devices (even those devices you have set to always remember).
Related Self-Service Article
Included in your email confirmation there will be a custom link to cancel your booking. Click on the link included in the confirmation email. The cancelation link is also included in the description of the calendar invitation if you added the booking to your calendar.
Click on the ‘Cancel Booking’ button to cancel an individual booking or the ‘Cancel All Bookings’ button to cancel all. Note that there is no additional confirmation step, so please proceed carefully.

You will receive a “Booking canceled!” message when the cancellation is complete.

What is a Campus Pay Kiosk?
Campus Pay Kiosks allow students and employees to deposit funds to their FIT Fashion Express Account or check all account balances available on their FIT ID Card.
Wall-mounted Pay Kiosks accept US Bills ($1, $5, $10, $20, $50, or $100). Stations do not take coins or make change.
The Pay Kiosk in the Library has been fitted to accept Credit Cards. (OUT OF ORDER)
New Model Kiosks Coming soon…

What can you use your “Fashion Express” account funds for?
Funds added using a Campus Pay Kiosk or online via eAccounts will be deposited into your Fashion Express account and can be used for the following:
- Printing
- Copying
- PrintFX and FabLab orders
- To Purchase Food at any on-campus food service location*
*If you have a Declining Balance with your Meal Plan – that account money will be used automatically by dining services for food purchases. Once the Declining Balance is at $0, you can use your “Fashion Express” account funds for food purchases.
How much are Pay-for-Print services?

Printouts Cost:
10 cents for black and white
90 cents for color
Tech Tip:
Letter 8.5 x 11 cost is the same as tabloid 11 x 17

Where are Campus Pay Kiosks located?
- Outside Student Dining Hall – Dubinsky Center
- Computer Commons CC15 – Feldman Center Basement
- Outside PrintFX – Pomerantz Center D529A
- FIT Library 5th Floor – Goodman Center

How to deposit funds using Cash method
To begin, select the button next to “Deposit”

Select Yes or No to “Would You Like a Receipt”
Note: You will be presented with a balance screen at the end but a receipt is a good option to have a record of your deposit.

Swipe your ID (Computer Commons Station)
At the Computer Commons Pay Kiosk, you will insert (dip) your ID card with the magnetic stripe up and toward the keypad.

Swipe your ID (Library Station)
At the Library Pay Kiosk you will swipe your ID card with the magnetic stripe towards the keypad (note tap feature is not functioning as of date listed under Last Updated).

Insert bills face up.
The wall-mounted Pay Kiosks accept US bills in $1, $5, $10, $20, $50, or $100 denominations.
Stations do not take coins or make change.

Once you have completed adding the amount you wish to add to deposit, select the button next to “Done.”

The balance screen will display with details of the Deposit amount and the total funds after the deposit.
Select the button next to “Done.”

If you selected “Yes” for a receipt, the receipt slip will be printed automatically from the slot on the left-hand side of the main keypad.

How to deposit funds using Credit Card method (Library only)
At this time, only the Pay Kiosk in the FIT Library has been fitted to accept credit cards. However, you may also add funds with a credit card using the online option, to learn more visit our Self Service Article “How to add money to your Campus Card online.”
To begin, select the button next to “Deposit”

Select Yes or No to “Would You Like a Receipt”
Note: You will be presented with a Balance screen at the end but a receipt is a good option to have a record of your deposit.
Cancel button is not functioning on this station.
Swipe your ID card with the magnetic stripe towards the keypad (note tap feature and cancel button is not functioning as of date listed under Last Updated).

Enter the amount you would like to deposit on the main keypad, then press the button next to Enter.
Note: Since the cancel button is not functioning on this station, you will need to wait for the Pay Kiosk to time out (approximately 30 seconds) or use the cancel button (red button with “x:) on the credit card keypad if you make a mistake with the entered amount.

Insert your credit card in the card slot on the right. Do not remove the card until it has been read.

The balance screen will display with details of the Deposit amount and the total funds after the deposit.
Select the button next to “Done.”

If you selected “Yes” for a receipt, the receipt slip will be printed automatically from the slot on the left-hand side of the main keypad.

Related Self-Service Article
1. Go to the eAccounts website
Method 1: Go directly to the eAccounts website at https://fit-sp.transactcampus.com/eaccounts
Method 2: Log in to MyFIT with your FIT username and password. Select the “Web Resources” page and then select “FIT Card” under FIT Web Resources.
2. Log in to your eAccount
Select Patron Type
*Staff receives a paycheck from FIT; Resident Assistants, Leadership Ambassadors, Orientation Leaders, Student Monitors, Tutors, and other Student employees may need to choose “Staff” to access their campus card account.
Enter your FIT username and password
Click the “Sign In” button

3. Add money to your Fashion Express account
Click on “+Add Money.” Then, select or leave Fashion Express as the Account option you wish to deposit funds.
What can you use your “Fashion Express” account funds for?
Funds added using a Campus Pay Kiosk or online via eAccounts will be deposited into your Fashion Express account and can be used for the following:
- Printing
- Copying
- PrintFX and FabLab orders
- To Purchase Food at any on-campus food service location*
*If you have a Declining Balance with your Meal Plan – that account money will be used automatically by dining services for food purchases. Once the Declining Balance is at $0, you can use your “Fashion Express” account funds for food purchases.
How much are Pay-for-Print services?
Printouts Cost:
10 cents for black and white
90 cents for color
Tech Tip:
Letter 8.5 x 11 cost is the same as tabloid 11 x 17
4. Select your deposit type and amount
Select “Specific Amount” or “Balance Top-Off”*. Then enter the Deposit Amount or Target Balance. Click Next.
*Use “Balance Top-Off” and the system will calculate the amount needed to reach a Target Balance you enter.
Example: John Doe’s current balance is $0.86 if he wants $5 in his account. He can select Balance Top-Off & enter 5.00 as the Target Balance, and the system will calculate $4.14 as the deposit amount.

5. Select payment method
Select Credit Card as the method of payment if not selected by default and click “Next.”
6. Complete payment/billing information form
Fill in all the Payment and Billing Information Fields. Fields with an asterisk * are required.
Check the box next to “*I have read and agree to Terms and Conditions” after you have read the Terms and Conditions. Then click the “Submit” button.

7. Review your deposit
Your deposit is not successfully completed until you click “Finish Deposit” and see the “Receipt for Account Deposit page”.
If you find a mistake on this page, click “Cancel.”
If you confirm everything is correct, click “Finish Deposit.”
No money will be deposited into your account until you click “Finish Deposit.”

8. Print or confirm email receipt
Print this page for your records or confirm you received your Email Receipt before you log out or return to the main page of your eAccount.
OPTIONAL: Check the box “Save this payment method for future use.” Choose a Payment Method Alias to help you remember the Credit Card saved. Then click Save. An Email Receipt will be sent to your FIT Email Account automatically.
You can add email addresses to send the additional Receipt then click Send Receipt.
Click on “Home” to return to the main page of your eAccount

Example Email Receipt
An Email Receipt will automatically be sent to your FIT Email Account. Verify the Email Receipt has been received before you log out or return to the main page of your eAccount.

10. Review your new account balance
Your New Account Balance will be visible on the main page of your eAccount.

Related Self-Service Article
Who is granted Adobe CC access?
- Students who pay the FIT technology fee
New students will be granted access to Adobe CC two days before the start of their first semester at FIT. - FIT faculty, staff, and administrators
Note: Contractors and contingent workers (employees hired on a temporary or as-needed basis, such as Models, Peer Note Takers, Tutors, etc.) are only provided access to Adobe CC through Shared Device Licenses for access in computer labs and classrooms.
How to sign in to Adobe CC
Click on the Adobe Creative Cloud icon
If you are using a personal computer and no Adobe products are installed, go to creativecloud.adobe.com/apps


The Adobe sign-in window will appear or you will be redirected to a new page with the sign-in window.
Enter your FIT email address and click the “Continue” button.
Do NOT use the “Continue with Google” option. You must enter your FIT email address and click the “Continue” button.

You may be directed to Select an account. YOU MUST Click “Company or School Account”

You will be directed to verify your FIT username and password. Enter your FIT username and password, then click “Sign in”

You may be directed to Select a profile to sign in. YOU MUST Click “FASHION INSTITUTE OF TECHNOLOGY”

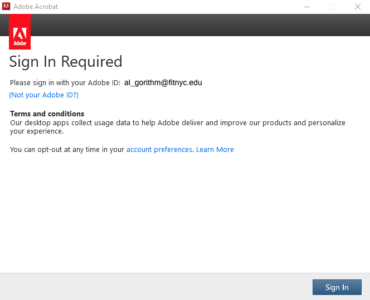
You may be required to complete the additional sign-in steps below after selecting an Adobe CC product in order to agree to the Terms and conditions.
Click the “Sign In” button – it may take a few seconds to load the next screen as the software authenticates to the activation server.
Click the “Continue” button on the Thank you screen. 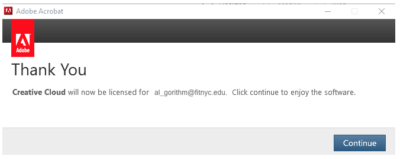
After you successfully authenticate you may begin using Adobe CC.
Eligible employees and students can install Adobe CC apps on home or personal computers.
- The installation license is for a Named User License; therefore, individuals will only be able to sign in to two Named User Licensed computers simultaneously.
When you attempt to sign in to more than two devices, you will get an “Activation limit reached” or “sign-in failed” error. To resolve this error, you will need to sign out of other devices. Follow the instructions created by Adobe to learn how to sign out of all computers, sign out of a single computer, or sign out from account page.
Remember signing in to a FIT classroom and lab computers does not count towards your two machine limit since FIT classroom and lab computers use a Shared Device License.
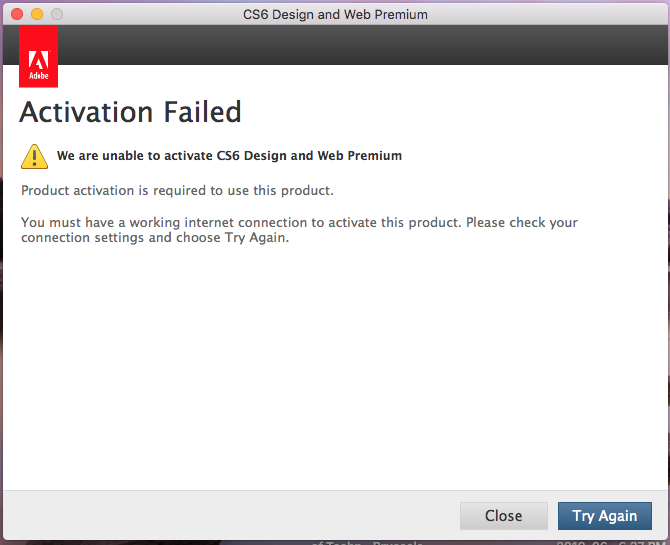
Error “Activation Failed”
Important information about Adobe CC deployment
As of late September 2021, the latest version of Adobe CC was deployed to all FIT windows computers. Individuals encountering this error on FIT windows computers should follow the sign out steps outlined below. Please contact TechHelp, if you need additional assistance or are encountering this error on an FIT Mac.
-
Click on the Adobe Creative Cloud icon

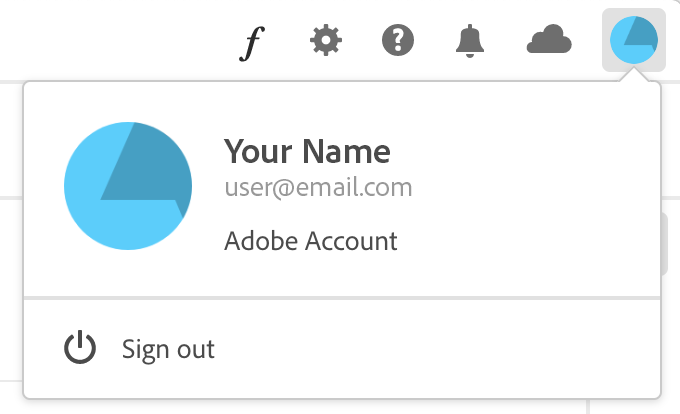
-
Click on the blue pie chart icon, and select “Sign out”
-
Complete sign-out, by clicking the “Continue” button on the
-
Sign back into Adobe CC – follow the step-by-step instructions provided on this page.


Error “Activation Limit Reached”
Important information about Activation Limits
When you attempt to sign in to more than two devices with a Named User License, you will get an “Activation limit reached” or “sign-in failed” error. To resolve this error, you will need to sign out of other devices. Follow the instructions created by Adobe to learn how to sign out of all computers, sign out of a single computer, or sign out from account page.
Named User Licenses will be the type of license used on all FIT-owned computers in office spaces and home or personal computers; eligible employees and students install Adobe CC apps. Eligible employees and students will only be able to log in to Adobe CC on two devices that use Named User Licenses at a time.
Shared Device Licenses will be used on all classroom and lab computers.
There is no limit to the number of Shared Device License computers on which eligible employees and students can access Adobe CC.
Error “Your subscription has ended”
Important information FIT employees granted Adobe CC Accounts prior to August 2020
As emailed and posted in July 2021, one of the first licensing changes made by Adobe impacted Faculty and Staff issued Adobe CC home-use account under the previous approval process (before August 2020).
These employees were requested to update their Adobe Creative Cloud home-use account to Enterprise and provided the following instructions: How to update an Adobe Creative Cloud home-use account to Enterprise
Individuals that did not complete these steps and continue to sign in with Adobe Home-use credentials may get the message “Your subscription has ended.”
If you are a current student eligible for Adobe CC access and you have followed the instructions to sign in with your FIT credentials, please contact TechHelp.
How to install Adobe CC applications
Important information about Activation Limits
eligible employees and students can install Adobe CC apps on home or personal computers.
- The installation license through the Federated ID is for a Named User License; therefore, individuals will only be able to sign in to two Named User Licensed computers simultaneously.
When you attempt to sign in to more than two devices, you will get an “Activation limit reached” or “sign-in failed” error. To resolve this error, you will need to sign out of other devices. Follow the instructions created by Adobe to learn how to sign out of all computers, sign out of a single computer, or sign out from account page.
Once you are signed in successfully click the Download button for the app you want to install.

Double-click the downloaded file to launch the installer.
Follow the on-screen instructions to complete the installation.
On successful installation, the Creative Cloud desktop app launches at the same time as your Creative Cloud app.
To install more apps, click Install for the app in the Creative Cloud desktop app. Looking for the Creative Cloud desktop app? It installs automatically with your first app. If you prefer, you can download it directly.