G Suite for Education offers a multitude of security features including allowing you to monitor how your account is being accessed through the Activity Information panel. This is one of the easiest ways for you to ensure that your account isn’t being accessed without your permission. “The Activity Information Panel” allows you to check what browser, device, and locations where your account has been signed into from.
How to Check your Activity Information
Go to Settings
- Click on Settings (Cog Icon)
- Select See all settings
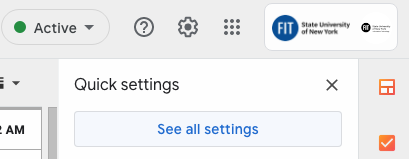
Scroll to the Bottom and then Click on “Details”
![]()
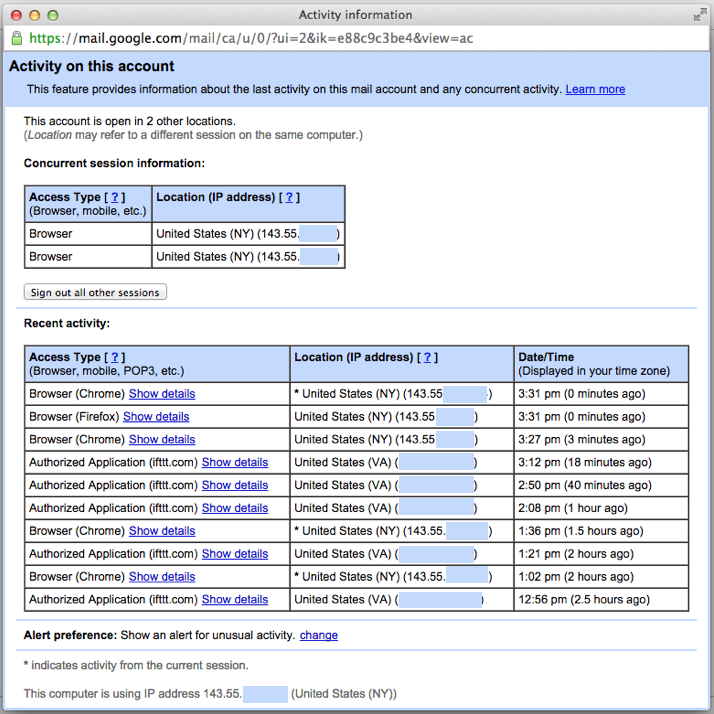
What you can do from the Activity Information Panel?
– Check the IP address at the bottom of the window “This computer is using IP address” to know if the Recent activity was from your computer.
– If you have signed into another computer recently or you aren’t sure about another session. Click “Sign out all other sessions”
– Set your Alert preference, we recommend having it set to “Show an alert for unusual activity.”
– Revoke access for any Applications you previously authorized. Click on “Show details” then on “Manage Account Access” the Account Permissions page will open. Now you can select the application – then click “Revoke”.
Don’t forget to change your password if you see any activity that is not you.
From an FIT desk phone
- Dial extension 7-8888
- Enter your password, then press #
- Press 1 and select your messaging options
From any phone (Remote access option)
- Dial 212-217-8888
- Press #
- Enter your Mailbox Number/Phone Extension (7-XXXX)
Note: the system takes a few seconds after you enter your extension before you will hear the next prompt - Enter your password, then press #
- Press 1 and select your messaging options
Tech Tip
How to skip and delete a message?
1. While listening to your message, press 3 3 (the number 3 twice).
This will fast forward to end of the message.
2. Then press 7 key to delete.
How do I skip a message but not delete it?
While listening to your message, press the pound key (#) to skip a message.
- Dial 212-217-8888 (off-campus) or 7-8888 (on-campus)
- Enter your mailbox number/phone extension (7-XXXX)
- Enter your current password
- Press 4 for Mailbox Options
- Press 9 for Administrative Options
- Follow automated prompts
You will not be able to use these instructions to manage your password if you have not registered to use Self-Service Password Reset (SSPR). Learn how to register.
FIT generic accounts cannot use SSPR (i.e., [email protected]); please contact TechHelp for assistance.
1. Click the “Change Password” button on this page or from the Password Help Center to be directed to the Self-Service Password Reset (SSPR). Note you will be redirected to a Microsoft page as our SSPR is a Microsoft product.
2. Enter your FIT Email Address and the characters in the picture or words in the audio, then click the “Next” button. Note: the page will load with a Microsoft logo, the FIT logo will appear after you enter a valid FIT email address.
You must enter an FIT email address, you will be presented with error text in red if you enter a username or invalid FIT email address.

3. Click on the radial button next to the method you wish to use for verification. Enter additional details and verification code to continue.

4. Enter your verification code.

5. Enter and confirm your new password, then click the “Next” to create your new password.
Once you create a password that meets the password requirements you will be redirected to your Office 365 account.
The password created using SSPR is your FIT password and grants you access to MyFIT, email, and more not just Office 365.

6. If you have connected a Mobile device to the FIT wireless network you need to “Forget the Network” and then reconnect with the new password. Failure to do this may cause your account to get locked out. Learn how Android Instructions or iOS Instructions.
7. If you have 2FA turned on for your FIT Google Workspace account you will be asked to sign in and authenticate again on all devices (even those devices you have set to always remember).
Related Self-Service Article
Who is granted Adobe CC access?
- Students who pay the FIT technology fee
New students will be granted access to Adobe CC two days before the start of their first semester at FIT. - FIT faculty, staff, and administrators
Note: Contractors and contingent workers (employees hired on a temporary or as-needed basis, such as Models, Peer Note Takers, Tutors, etc.) are only provided access to Adobe CC through Shared Device Licenses for access in computer labs and classrooms.
How to sign in to Adobe CC
Click on the Adobe Creative Cloud icon
If you are using a personal computer and no Adobe products are installed, go to creativecloud.adobe.com/apps


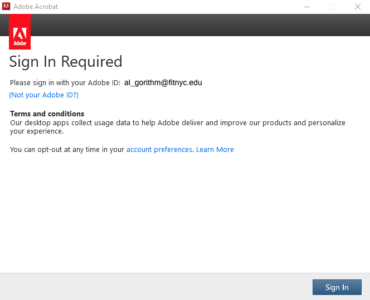
The Adobe sign-in window will appear or you will be redirected to a new page with the sign-in window.
Enter your FIT email address and click the “Continue” button.
Do NOT use the “Continue with Google” option. You must enter your FIT email address and click the “Continue” button.

You may be directed to Select an account. YOU MUST Click “Company or School Account”

You will be directed to verify your FIT username and password. Enter your FIT username and password, then click “Sign in”

You may be directed to Select a profile to sign in. YOU MUST Click “FASHION INSTITUTE OF TECHNOLOGY”

You may be required to complete the additional sign-in steps below after selecting an Adobe CC product in order to agree to the Terms and conditions.
Click the “Sign In” button – it may take a few seconds to load the next screen as the software authenticates to the activation server.
Click the “Continue” button on the Thank you screen. 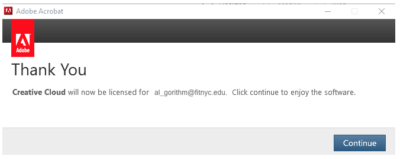
After you successfully authenticate you may begin using Adobe CC.
Eligible employees and students can install Adobe CC apps on home or personal computers.
- The installation license is for a Named User License; therefore, individuals will only be able to sign in to two Named User Licensed computers simultaneously.
When you attempt to sign in to more than two devices, you will get an “Activation limit reached” or “sign-in failed” error. To resolve this error, you will need to sign out of other devices. Follow the instructions created by Adobe to learn how to sign out of all computers, sign out of a single computer, or sign out from account page.
Remember signing in to a FIT classroom and lab computers does not count towards your two machine limit since FIT classroom and lab computers use a Shared Device License.
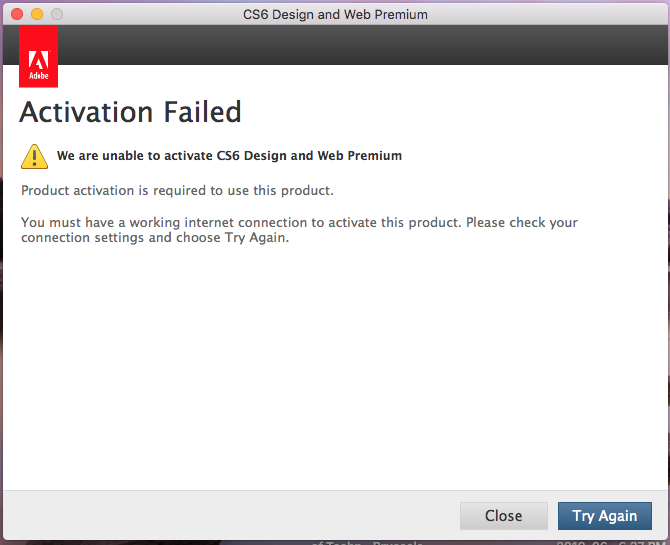
Error “Activation Failed”
Important information about Adobe CC deployment
As of late September 2021, the latest version of Adobe CC was deployed to all FIT windows computers. Individuals encountering this error on FIT windows computers should follow the sign out steps outlined below. Please contact TechHelp, if you need additional assistance or are encountering this error on an FIT Mac.
-
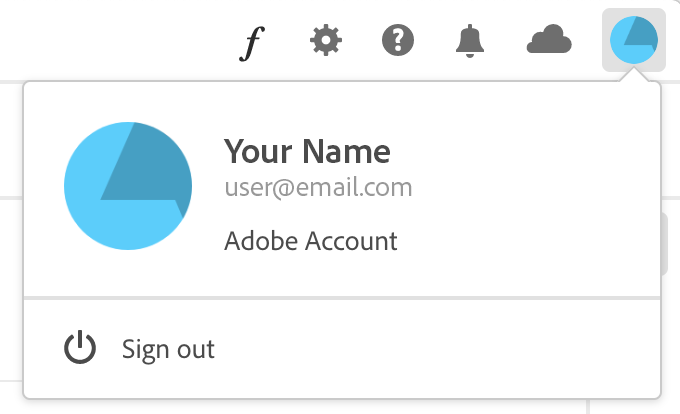
Click on the Adobe Creative Cloud icon

-
Click on the blue pie chart icon, and select “Sign out”
-
Complete sign-out, by clicking the “Continue” button on the
-
Sign back into Adobe CC – follow the step-by-step instructions provided on this page.


Error “Activation Limit Reached”
Important information about Activation Limits
When you attempt to sign in to more than two devices with a Named User License, you will get an “Activation limit reached” or “sign-in failed” error. To resolve this error, you will need to sign out of other devices. Follow the instructions created by Adobe to learn how to sign out of all computers, sign out of a single computer, or sign out from account page.
Named User Licenses will be the type of license used on all FIT-owned computers in office spaces and home or personal computers; eligible employees and students install Adobe CC apps. Eligible employees and students will only be able to log in to Adobe CC on two devices that use Named User Licenses at a time.
Shared Device Licenses will be used on all classroom and lab computers.
There is no limit to the number of Shared Device License computers on which eligible employees and students can access Adobe CC.
Error “Your subscription has ended”
Important information FIT employees granted Adobe CC Accounts prior to August 2020
As emailed and posted in July 2021, one of the first licensing changes made by Adobe impacted Faculty and Staff issued Adobe CC home-use account under the previous approval process (before August 2020).
These employees were requested to update their Adobe Creative Cloud home-use account to Enterprise and provided the following instructions: How to update an Adobe Creative Cloud home-use account to Enterprise
Individuals that did not complete these steps and continue to sign in with Adobe Home-use credentials may get the message “Your subscription has ended.”
If you are a current student eligible for Adobe CC access and you have followed the instructions to sign in with your FIT credentials, please contact TechHelp.
How to install Adobe CC applications
Important information about Activation Limits
eligible employees and students can install Adobe CC apps on home or personal computers.
- The installation license through the Federated ID is for a Named User License; therefore, individuals will only be able to sign in to two Named User Licensed computers simultaneously.
When you attempt to sign in to more than two devices, you will get an “Activation limit reached” or “sign-in failed” error. To resolve this error, you will need to sign out of other devices. Follow the instructions created by Adobe to learn how to sign out of all computers, sign out of a single computer, or sign out from account page.
Once you are signed in successfully click the Download button for the app you want to install.

Double-click the downloaded file to launch the installer.
Follow the on-screen instructions to complete the installation.
On successful installation, the Creative Cloud desktop app launches at the same time as your Creative Cloud app.
To install more apps, click Install for the app in the Creative Cloud desktop app. Looking for the Creative Cloud desktop app? It installs automatically with your first app. If you prefer, you can download it directly.

3. Hover over the “1-50 of …” that shows you how many emails you have at the top of the page. When you do this, a dropdown will allow you to click “Oldest.” That takes you to the oldest page in your Gmail history.

Reminder: Starting on February 28, 2019, all email and chat histories older than 8 years will automatically be permanently deleted, including archived messages and emails that have been moved to Labels (referred to as “folders” in Outlook). Permanently deleted email and chat histories do not go to the trash label but are purged from FIT systems and cannot be retrieved. For more details about this change please visit our project page at https://it.fitnyc.edu/kb/fit-email-retention
What is eduroam?
eduroam (education roaming), is an encrypted, world-wide roaming access service developed for the international research and education community. FIT is proud to be a member and provide eduroam service.
Where can I use eduroam?
eduroam allows FIT students, faculty, and staff to connect to the Internet at participating institutions in the United States and abroad. Equally, visitors from participating institutions in the eduroam network can connect to the eduroam wireless network at FIT.
Is my password being shared with other eduroam insitutions?
Your user credentials (username and password) are kept secure because eduroam does not share them with the site you’re visiting. Instead, they are forwarded to your home institution, where they can be verified and validated.
Find out about eduroam security at https://www.eduroam.org/eduroam-security/.
I am a member of the FIT community; how do I connect to eduroam?
When visiting a participating eduroam location, check the eduroam website for the eduroam SSID (most will be eduroam). Turn on your WiFi and select the institution’s eduroam SSID, enter your FIT email address when prompted for a username and FIT password for the password.
I am visiting FIT from another Eduroam campus; how to connect to eduroam at FIT?
As a visitor to FIT from a participating eduroam institution, turn on your WiFi then select the SSID eduroam and enter your email address and password you use at your institution.
For additional assistance, contact FIT’s TechHelp.
Have you ever wondered if your account information or password has ever been exposed in a data breach?
Have I Been PWNED? (HIBP) is a free resource developed by a Microsoft researcher for anyone to quickly assess if they may have been put at risk due to an online account of theirs having been compromised or “pwned” in a data breach. If you enter your email address or password into HIBP, it confidentially checks to see if your credentials appear in public data stores used by hackers and other cybercriminals.
To check if your email account or password was revealed in a data breach visit the webpages below:
Email account: https://haveibeenpwned.com/
Password: https://haveibeenpwned.com/Passwords
What does pwned mean?
Pwned is a slang term derived from the verb own, meaning to appropriate or to conquer to gain ownership.
How do I know the site isn’t just harvesting searched email addresses?
The site is a free service used throughout the security industry for people to determine if their email address or password has been put onto public or dark web credential bulletin boards as a result of a breach. If you used a particular email address and password on a site that has been breached, it’s likely that the address or password will show up on HaveIBeenPwned.
As with any website, if you’re concerned about the intent or security, don’t use it.
What do I do if HaveIBeenPwned finds a match?
If your email address shows as a match, consider the email account: if it’s [email protected], or [email protected], there are lots of ways people can find or guess those addresses. If the address is less obvious, consider changing it.
If your password shows up as a match, change it. Note that if you used a weak password like “Password123”, the match might be related to you or millions of other people. Still, you should change it, either because it’s been Pwned or because it’s too obvious. Each site has different password requirements, but two major guidelines are that longer passwords are better than short ones, and don’t include elements like your birthday that are easily guessable or available on social media.
As a public institution in New York State where Freedom of Information laws are broad, FIT is legally required to review and produce documents and data—including email—at the public’s request, regardless of the purpose of the request, with limited exceptions. FIT is subject to review by any number of agencies charged with enforcing certain legal and compliance obligations. The scope and burdens of such reviews can greatly increase when we keep more information for terms longer than are required by New York State Archives Record Retention and Disposition Schedule LGS-1.
To aid in this best practice behavior for email, on April 4, 2019, FIT moved to an email retention program in which all emails older than eight (8) years are deleted automatically, including archived messages, chat histories, attachments, and emails that have been moved to Labels (referred to as “folders” in Outlook).
How to Connect iOS
Follow the instructions below when connecting to FITAIR for the first time on your iOS device. If you were previously connected or recently updated your phone’s operating system you may need to first “Forget FITAIR” then perform the instructions below.
Note screenshots and instructions may vary slightly depending on your device and operating system.
- Select Setting from your Apps

2. Select Wi-Fi

3. Turn on your WiFi

4. Select FITAIR from Networks

5.) Enter your FIT Username and Password and Select Join

6.) Click “Trust” in Top Right Corner or the “Accept” Button on the Certificate

7.) You are now connected to the FIT WiFi Network FITAIR

How to Connect Android
Follow the instructions below when connecting to FITAIR for the first time on your Android device. If you were previously connected or recently updated your phone’s operating system you may need to first “Forget FITAIR” then perform the instructions below.
Note screenshots and instructions may vary slightly depending on your device and operating system.
1.) Open your phone’s Settings app

2.) Tap Network & internet, then Internet.

3.) Turn on Wi-Fi, then tap to select FITAIR.
Note: Networks, like FITAIR, that require a password have a Lock .
Tech Tip: After you connect, the network is “Saved.” When your phone is near and Wi-Fi is on, your phone automatically connects to FITAIR with the password entered. Be sure, to Forget FITAIR and update the saved password each time you change your FIT password.

4.) Enter the settings to connect to FITAIR
EAP method = PEAP
Phase 2 authentication = MSCHAPV2
CA Certificate= Use system certificates
Online Certificate Status = Leave blank or select “do not validate”
Domain = wifi.fitnyc.edu
Identity = Your FIT username
Anonymous Identity = Leave blank
Password = Your FIT password
Note: If these settings do not work and you believe your phone model is before 2020, you may try the settings above with the following alterations:
Phase 2 authentication = None
CA certificate = (Unspecified) or Do not validate

5.) You are now connected to FITAIR


How to Connect Mac
1.) Turn on the WiFi on your computer

2.) Click on the WiFi icon – Scroll and Select FITAIR

3.) An Authentication window will appear (Your window may not look exactly like the one below)
Enter your FIT Username and FIT Password – then click “Join”.

**Problems with your password? Did you change your password in the last week? Did you remember to update your password on your Phone & Tablets?**
Phones and tablets cache your password setting for connecting to WiFi networks in order to connect you faster. If you forget to update these devices they will try to authenticate with an old password causing your account to get locked out and you will have problems connecting/reconnecting other devices.
Please follow the links below for instructions to update your password on your mobile devices.
Update FITAIR Password for IOS
Update FITAIR Password for Android
If the instructions above do not resolve your connection errors, please contact TechHelp.
How to Connect Windows
1.) Turn on the WiFi on your computer.

2.) Click on the WiFi icon – scroll to FITAIR – then click “Connect”.

3.) The connection will begin.

4.) The Windows Security Alert window may appear – Click “Connect”.
5.) Enter in your FIT Username and FIT Password in the Network Authentication window and click “OK”.

6.) The Windows Security Alert window may appear AGAIN – Click “Connect”.
7.) You are now Connected to FITAIR.

How to Connect Chromebook
Click on the WiFi icon in the bottom righthand corner of the screen (near the time).

Click on the WiFi icon.
Note if you are not connected to any networks it will display as “Not connected” and if you are connected to a network it will display the name of the network connected to.

First time joining FITAIR you will need to complete the Join Wi-Fi network page with the following settings.
SSID = FITAIR
Security = EAP
EAP method = PEAP
EAP Phase 2 authentication = MSCHAPv2
Server CA certificate = Default

You will need to verify your FIT credentials to connect to FITAIR on the Join Wi-Fi network page.
Identity = Your FIT username
Password = Your FIT password
Anonymous Identity = Leave empty
Click the “Connect Button”
Additional Tips:
Slide the toggle to on for “Save identity and password” to automatically connect to FITAIR when you are in the range of the network. If you do this, you will need to Forget FITAIR and update the Join Wi-Fi network page the next time you change your password, or the Chromebook will try to connect with invalid/old credentials, causing you to get locked out.
Slide the toggle to off for “Allow other users of this device to use this network”

You are now connected to FITAIR
