Click on the “Sign in to your account” button in the “Adobe login change for FASHION INSTITUTE OF TECHNOLOGY.” email
OR
Click on the “Get Started” button in the “Access is granted. Enjoy All Apps now.” email
OR
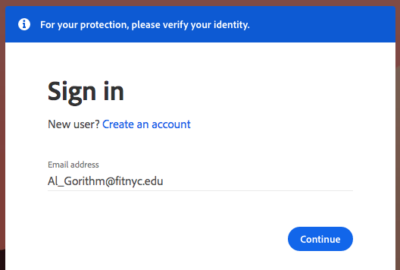
Go to adobe.com.
Enter your FIT email address and click the “Continue” button.
If you are not presented with the sign-in screen below, click on Sign in on the top right of the page.
If you were automatically signed in to your Adobe Home-Use account, sign out. Then click on Sign in on the top right of the page. Then enter your FIT email address and click the “Continue” button.
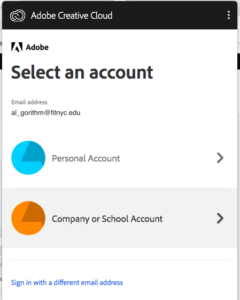
You will be directed to “Select an account”. YOU MUST Click “Company or School Account”
IMPORTANT: The email and password you used to create your Adobe Home-Use account are no longer under the FIT Licensing Agreement with Adobe.
You will still be able to access your home-use account when you select “Personal Account.”
You may get the message “Your subscription has ended” if you continue to sign in with your Adobe Home-Use credentials.
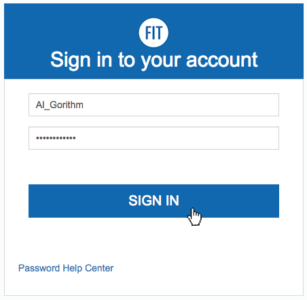
You will be directed an FIT screen to verify your FIT username and password. Enter your FIT username and password, then click “Sign In.”
You will be presented with an Asset Migration window giving you the option to migrate your content to the Enterprise Account.
Select the option best for you:
“Yes, I want Adobe to migrate my content.”
“No, I want to move my content manually later.”
Then click the “Continue” button.
We recommend you choose “Yes, I want Adobe to migrate my content.” and as the documents and saved content should be related to your work at FIT.
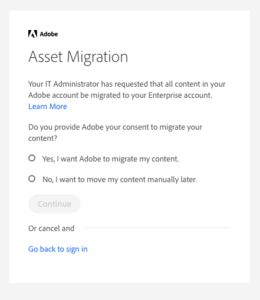
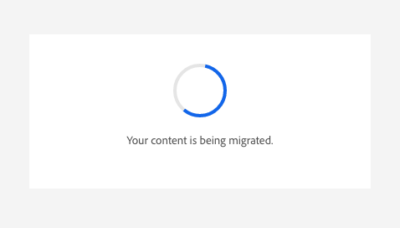
If you chose, “Yes, I want Adobe to migrate my content.” It may take a few minutes for your content to be migrated.
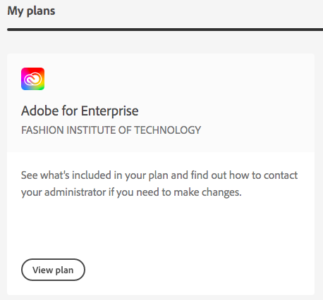
You will now have an Adobe for Enterprise account using your FIT email and password.
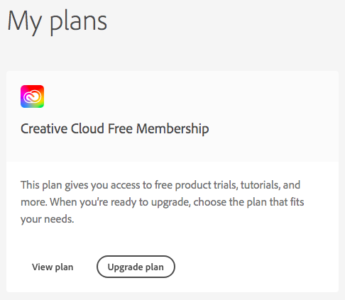
The email and password you used to create your Adobe Home-Use account will be converted to a “Creative Cloud Free Membership” account. If you used your FIT email for the creation of your Adobe Home-Use account you will still be able to access an Enterprise account following the instructions above.
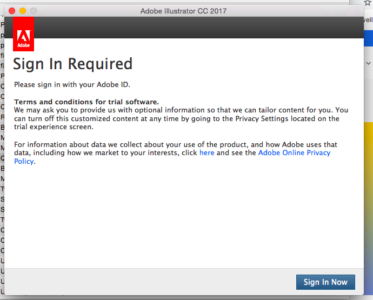
Note: When you access apps previously downloaded to your device using your home-use account you may be asked to reauthenticate (sign in) to validate your Enterprise License.
After changing your password, you may encounter the following error if you do not sync your password.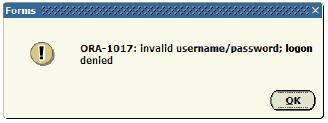
If you use a third-party tool that connects directly to Banner (e.g. NOLIJ, TOAD, BDM, etc.) and have changed your FIT password, you will need to update your password using the link “Sync Third-Party Tool” found in MyFIT.
To sync your password.
1. Sign in to MyFIT with your FIT username and password.
2. Click on “Employee” on the left-hand side.
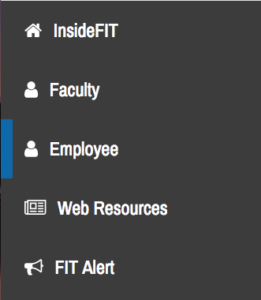
3. Navigate to the bottom of the Online Information System portlet and click on “Synch Third-Party Tool.”
4. The “SSO Manager Credential Management Utility” will open. Enter your FIT password in the password field. Reminder: Banner does not accept passwords with special characters (@,#,<,>,&,”,\) or spaces. If you have used spaces or special characters you will need to change your password. Then click the “Save” button.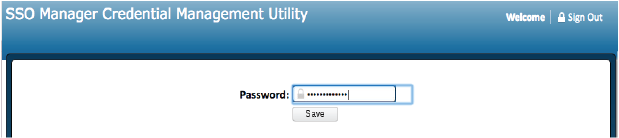
5. The following error page will appear. Your password has been saved. Click “Sign Out.”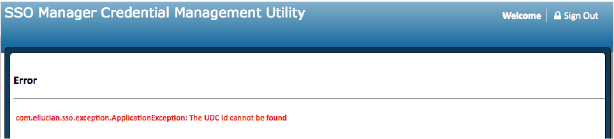
6. Sign out of MyFIT and quit the browser completely don’t just close the browser tab.
7. Open the browser and sign in to MyFIT again.
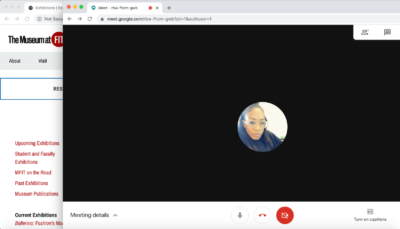
Learn how to present information while still being able to see your meeting participants.
Watch the video options below or follow the step-by-step instructions for Windows or Mac in the tabs below.
How to Split Screen Google Meet
- Join a Google Meet
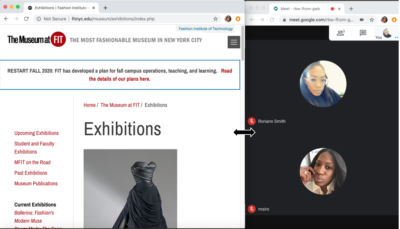
- Open the content you are going to present in another tab.
- If you are in full-screen mode, “Restore Down” icon in the upper right-hand corner of your browser window to exit full-screen mode
(Full-Screen Mode)
(Normal mode)
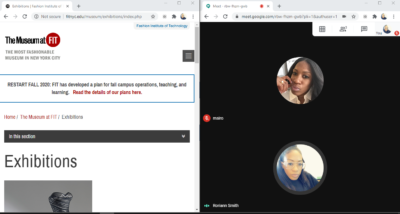
- Separate the tab you are presenting from your Google Meet tab by clicking on the Google Meet Tab and dragging it away from the other tab until you have two separate windows.
- Choose the program window that you want to snap to one side of the screen. Click on its title bar and drag it to one side of the display until the mouse pointer touches the edge. You will see a light outline of where the window will appear on the screen. Release the mouse button.
- The window should now be snapped to the side of the screen, and you should see all the other open programs appear on the opposite side of the screen.
- Click one of the other program windows. It will snap to the other side of the screen, so you’ll have two windows side-by-side.
- By default, the windows will be split evenly on your screen. You can adjust that by putting the mouse between the windows – you should see the pointer turn into a two-headed arrow – and then clicking and dragging to change the width of the windows.
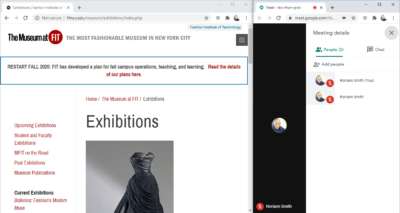
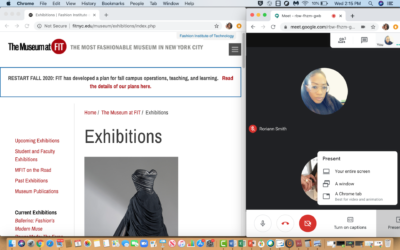
- In the bottom-right corner of your Google Meet Screen, select Present now.
- Select “A Chrome tab.”
- Select the content you want to share.
- Select Share.
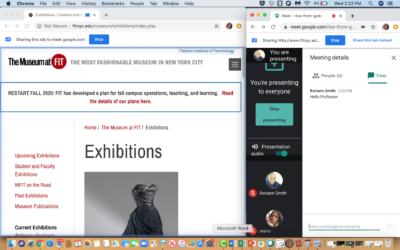
- To view the Participants, Click on the people icon in your Google Meet window.
- To view the Chat Panel, click on the chat icon in your Google Meet Window.


How to present multiple tabs
- Follow steps 1-6
- Select “A Window”.
- Select the window with the content you want to share.
- Select Share.
- Follow steps 8-11

Log into your Google Account
Go to the My Account Page (https://myaccount.google.com/)
Click on Device Activity and Notification

Under recently used devices click Review Devices

From the list find the lost or stolen phone or device and click “remove”

Go to the Website: http://myfit.fitnyc.edu
- Enter your FIT Username
- Enter your FIT Password
- Click the “Sign in” button
First time logging in?
The Division of Information Technology does not send your login information. Find out how you are sent your login details in the Self-Service Article, “What are my username and default password?”.

1. Go to www.google.com or you can go directly to the app you wish to access; gmail.com, sheets.google.com, docs.google.com, etc.
![]()
2. Click on the “Sign in” button in the upper right corner of the Google homepage.
If you do not see the “Sign in” button then you may already be signed in with another Gmail account; follow the How to log in to more than one Gmail account instructions or sign out of that account and sign back in with your FIT account.
![]()
3. Type your FIT email address and FIT password into the fields, Click “Sign in”
You must type your email address not your username

4. If you are accessing a new computer or recently changed your password you will need to verify with your 2-Step Verification option to log in.
5. Open the Apps launcher by clicking the grid of nine little dots in the top-right corner of most Google pages near your profile photo.


Related Policies
To have computer or AV equipment removed from an office space an Inventory Control Form must be filled out. The form can be found on MyFIT by navigating to the MyFIT tab > Quick Links at the bottom of the page > Forms > Asset Management Forms > Inventory Control Form A [Computer and A/V Equipment].
Steps:
- Fill out Form including the FIT property barcode number
- Have the Department head sign form
- Attach a copy to the equipment(s)
- Contact TechHelp and request removal of equipment by IT
- Keep equipment in a secure location until IT comes to remove the equipment
- Keep a copy of the form for your records
Access to Banner, Hyperion, BDM, and Nolij requires approval from “Data Owners” for the data an employee is wishing to access.
To request access an employee must complete the Banner/Hyperion/BDM/Nolij Access Form and obtain the appropriate signatures as detailed on the form.
Where to find the Access Form:
- Log in to MyFIT
- Select InsideFIT page on the left-hand side
- Scroll to the bottom of the page to find Quick links and click on Forms
- Click the link IT Forms
- Select Banner/Hyperion/BDM/Nolij Access Form
I. What to do prior to submitting a project request to IT?
1. Think about your goals: What is it that you want to accomplish with this project?
2. Check your finances: As a general rule, IT does not fund departmental or divisional projects. Adequate funding is required for any project to be approved
3. Time: Nothing impedes project success more than unrealistic timelines. Realistic project timelines provide for increased efficiencies and better resource management.
4. Look but don’t buy: If you have already completed some research and have identified a solution, that you think will work for you, please, do not purchase anything before contacting IT.
II. How to submit your project request to IT?
1. Complete an IT project request form.
2. IT will contact you for an initial discussion. The purpose of this contact is to help clarify your requirements and discuss other functional or operational issues.
3 Your potential project will be reviewed and if appropriate forwarded to the Technology Advisory Committee (TAC) for Review. If accepted, your project will be prioritized and placed in the IT Project Portfolio.
III. What happens after your project is accepted?
1. Initial IT resources are allocated to the project.
2. An IT representative will contact you and a project kick-off meeting will be scheduled. The meeting agenda will include:
– A general discussion about the entire project and timeline.
– Discussion of the project participant roles and responsibilities.
– An introduction of ITâ™s simplified 5 phase project structure:
– Discussion of initial next steps including initial schedule, procedures requirements gathering, etc.
IV. What is an exemplary project?
‘In an exemplary project, the client’s stated goals are realized within the finished product’
– For the results to match your intentions, they must be explicitly known beforehand. We must know what we are aiming for.
– A logical, step-by-step, plan is the roadmap towards the desired results. A plan needs to be in place prior to the start of any implementation.
– The project initiation and execution process is collaborative, within a supportive environment, where all participants clearly understand their own and each other’s roles and responsibilities.
– A realistic schedule, that reflects the actual and complete scope of the project, is a fundamental and mandatory requirement.
A generic email account provides a unique email address and mailbox that is generally used as a contact method for a specific service or group.
An FIT employee must be named the account owner and will be held responsible for the administration of the account, including password changes. While the service is only available to college employees, student clubs may request a generic account through the Office of Student Life, where an employee sponsor will assume responsibility for the account.
Once logged in to your account.
Select Account Management > Generic Email Account > Create Generic Account.
Once a ticket is submitted, please allow 1 to 2 days for the generic account to be created. Once the account is created, you will be notified via your FIT email.